HA-AC7916AB
AI Chat Dev Board
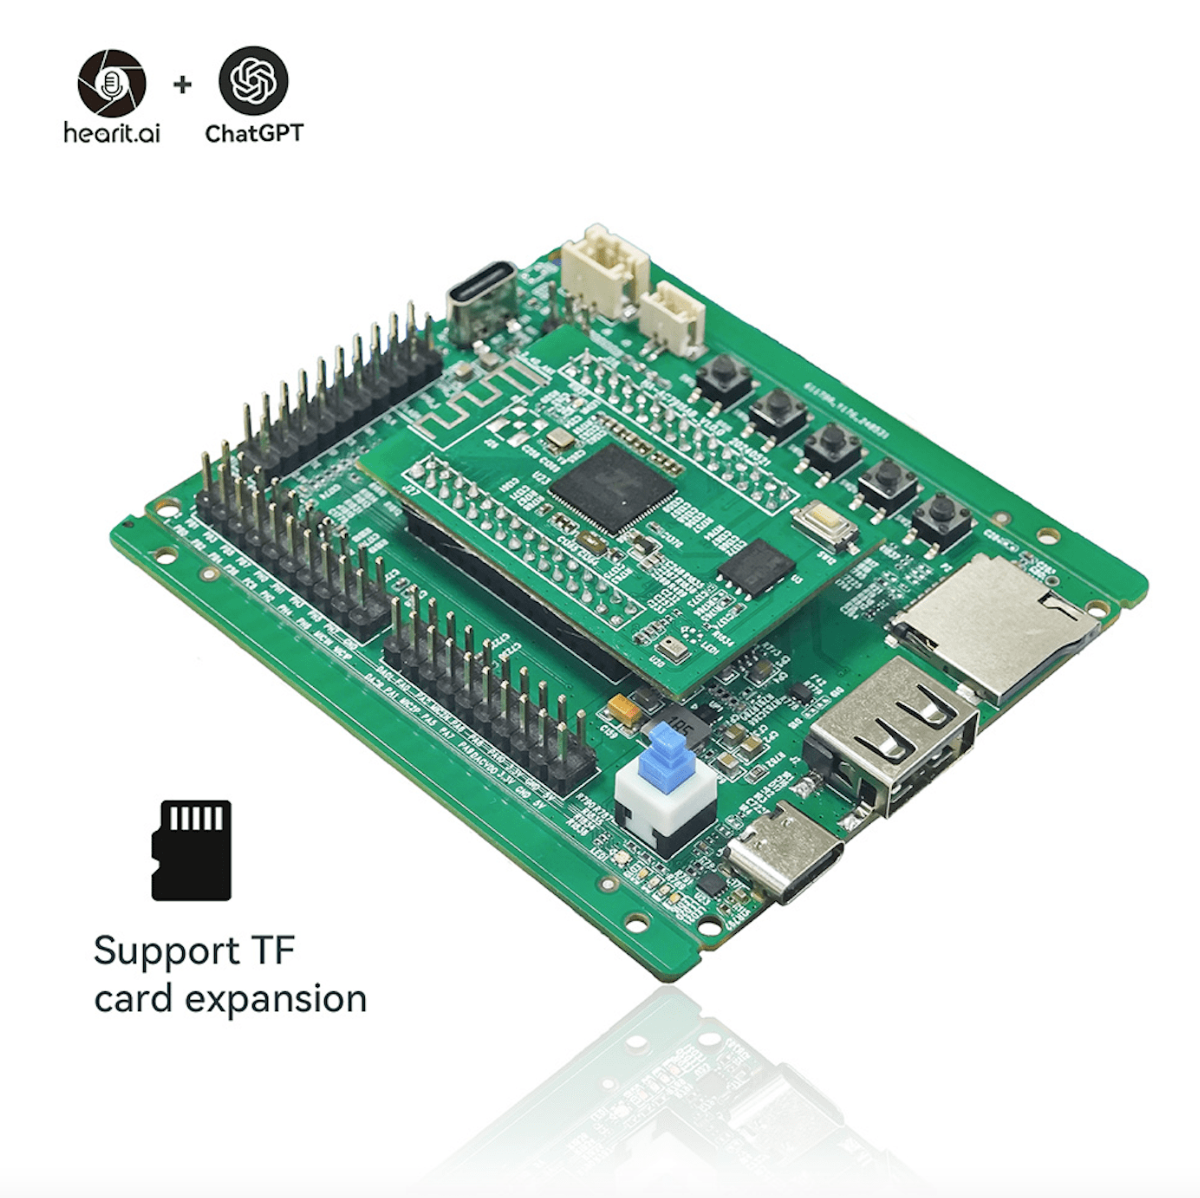
Table of Contents
- Introduction
- Specifications
- Quick Start Guide
- Hardware Guide
- Features in Detail
- Firmware
- Support
- Legal
1. Introduction
Your Standalone AI Voice Assistant
The AI Chat Dev Board (HA-AC791N) is a standalone Wi-Fi-enabled AI voice assistant device designed for developers and AI enthusiasts. Unlike other devices in our lineup, the HA-AC791N connects directly to the internet via Wi-Fi and operates independently without requiring a smartphone app. Through advanced AI technology powered by ChatGPT, it provides intelligent voice interaction for prototyping, development, and practical applications.
1.1. Core Features Overview
- ✨ Standalone Operation: Connects directly to Wi-Fi - no smartphone or app required
- 🤖 ChatGPT Integration: Direct connection to OpenAI's GPT models for intelligent conversation
- 🎙️ Dual Activation Modes: Button press or wake word ("XiaojieXiaojie") activation
- 🔧 Fully Customizable: Configure AI prompts, voice selection, and behavior via web interface
- 🌐 Web-based Configuration: Easy setup through any web browser (Windows/MacOS/Android/iOS)
- 🔊 Built-in Speaker: 1.5W speaker for clear audio feedback
- 🎤 High-Quality Microphone: Captures voice commands accurately
- 📡 OTA Updates: Support for both USB and web-based firmware updates
- 🔋 Battery Powered: Rechargeable battery for portable operation
- 💻 Developer Friendly: Ideal for prototyping and custom AI applications
2. Specifications
The HA-AC791N is a standalone Wi-Fi-enabled AI voice assistant development board with direct ChatGPT integration, designed for developers and custom AI applications.
📦 What's in the box?
- 1 × HA-AC791N Device
- 1 × USB Cable
- 1 × Battery (may require installation)
- 1 × User Manual
📄 Technical Specifications:
| Function | Parameter Details |
|---|---|
| Product Model | HA-AC791N |
| Product Name | AI Chat Dev Board |
| Connection | Wi-Fi (IEEE 802.11 b/g/n, 2.4GHz only) |
| AI Integration | Direct OpenAI API connection |
| Power Supply | Rechargeable battery + USB power |
| Speaker | 1.5W built-in speaker |
| Microphone | Built-in high-quality microphone |
| Button Controls | 5 physical buttons |
| Configuration | Web-based interface (192.168.1.1) |
| OTA Update | USB (Windows only) + Web OTA (all platforms) |
| Operating Mode | Standalone (no app required) |
| Platform Support | Windows, macOS, Android, iOS (for configuration only) |
3. Quick Start Guide
Get started with your HA-AC791N in just a few simple steps.
Step 1: Unboxing & Power On
- Take the HA-AC791N device, USB cable, and battery out of the package
- If the battery is not pre-installed, connect it to the device
- Connect the USB cable to charge the device if needed
- Press the power button to turn on the device
- You should hear a startup sound
- If not, try disconnecting and reconnecting the battery, then press the power button again
Step 2: Wi-Fi Configuration
The HA-AC791N requires Wi-Fi connection to access AI services. Follow these steps to configure your Wi-Fi.
Important: This device only supports 2.4GHz Wi-Fi networks. 5GHz networks are not compatible.
Enter Configuration Mode
- Press Button 4 to enter Wi-Fi configuration mode
- If not working, disconnect the battery, reconnect it, and try again
- The device will create its own Wi-Fi hotspot
Connect to Device
- On your computer or mobile device, open Wi-Fi settings
- Look for a network named
HA-AC791XXXXXX(XXXXXX varies by device) - Connect to this Wi-Fi network
- Open a web browser and enter
192.168.1.1in the address bar- Alternatively, scan this QR code:

Configure Settings
- You should see the configuration page:

- Click the
configbutton to access the configuration page:
-
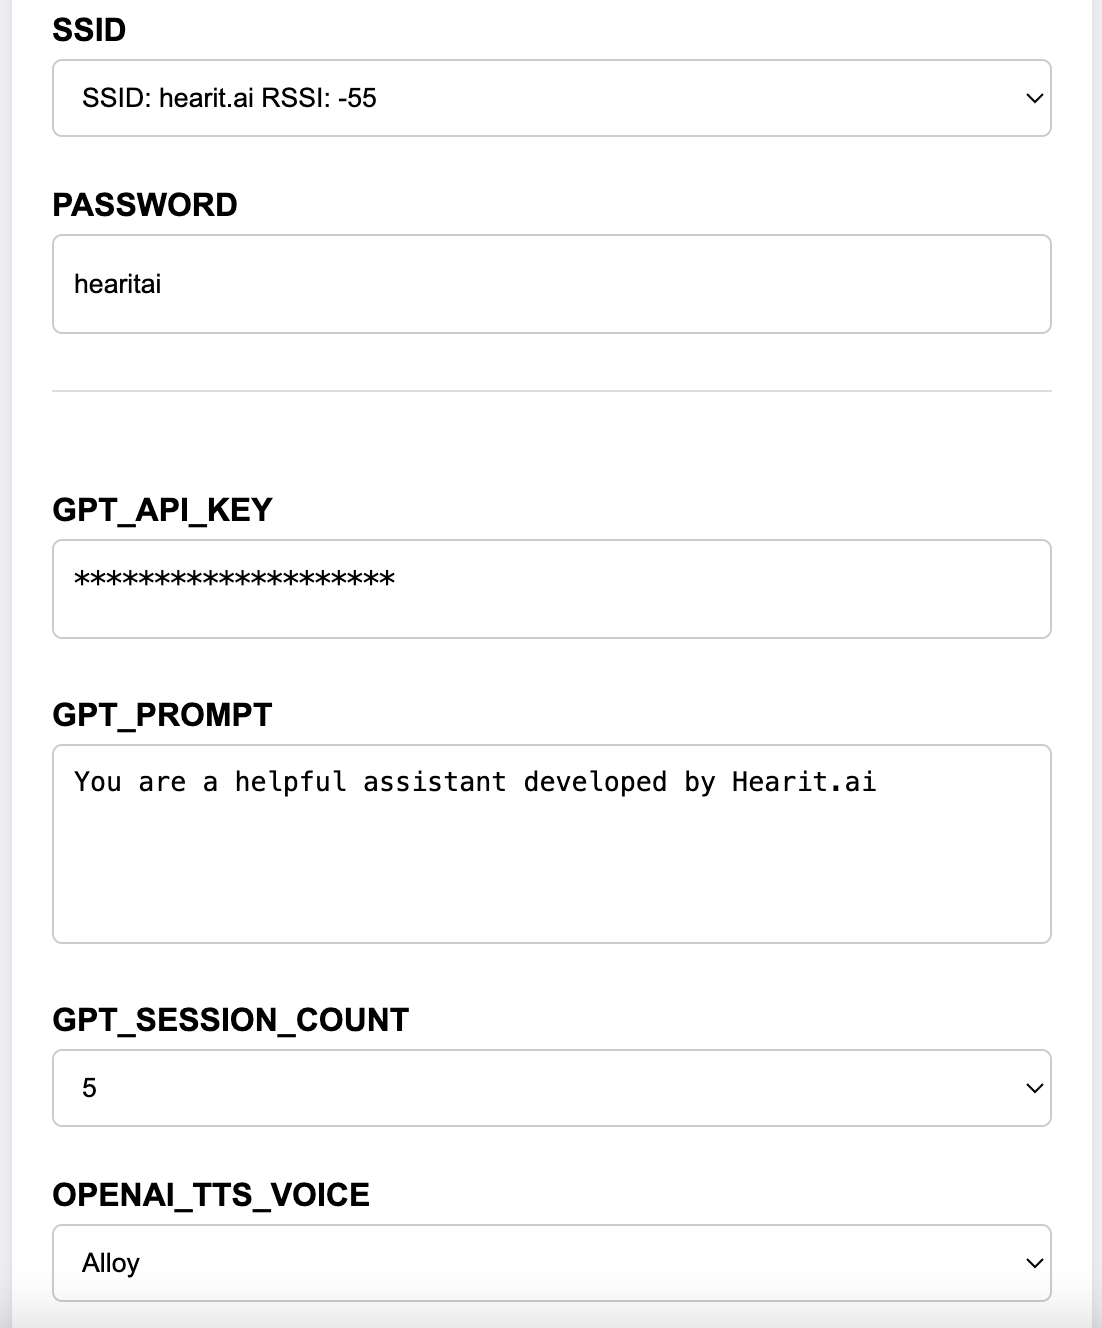
Select Your Wi-Fi Network:
- Choose your home or office Wi-Fi SSID from the list
- Enter the Wi-Fi password
-
Configure AI Settings:
- API-KEY: A default API key is provided for testing. You can use your own OpenAI API key for production use
- GPT_PROMPT: System prompt that defines AI behavior (customize for your specific use case)
- GPT_SESSION_COUNT: Number of conversation turns the AI remembers for context
- OPENAI_TTS_VOICE: Choose the AI voice from:
alloy,echo,fable,nova,onyx,shimmer
-
Click
Save Configto save your settings -
The device will announce "Connecting" and attempt to connect to your Wi-Fi network
-
If connection fails:
- Verify your SSID and password are correct
- Ensure you're connecting to a 2.4GHz network (not 5GHz)
- Press Button 4 to re-enter configuration mode and try again
Step 3: Start Using
Congratulations! Your device is now set up and connected to Wi-Fi. You can now begin using the AI chat features.
Two ways to interact:
- Button Press: Press Button 1 to start recording, press again to send to AI
- Voice Activation: Say "XiaojieXiaojie" (wake word) to activate
4. Hardware Guide
4.1. Button Operations
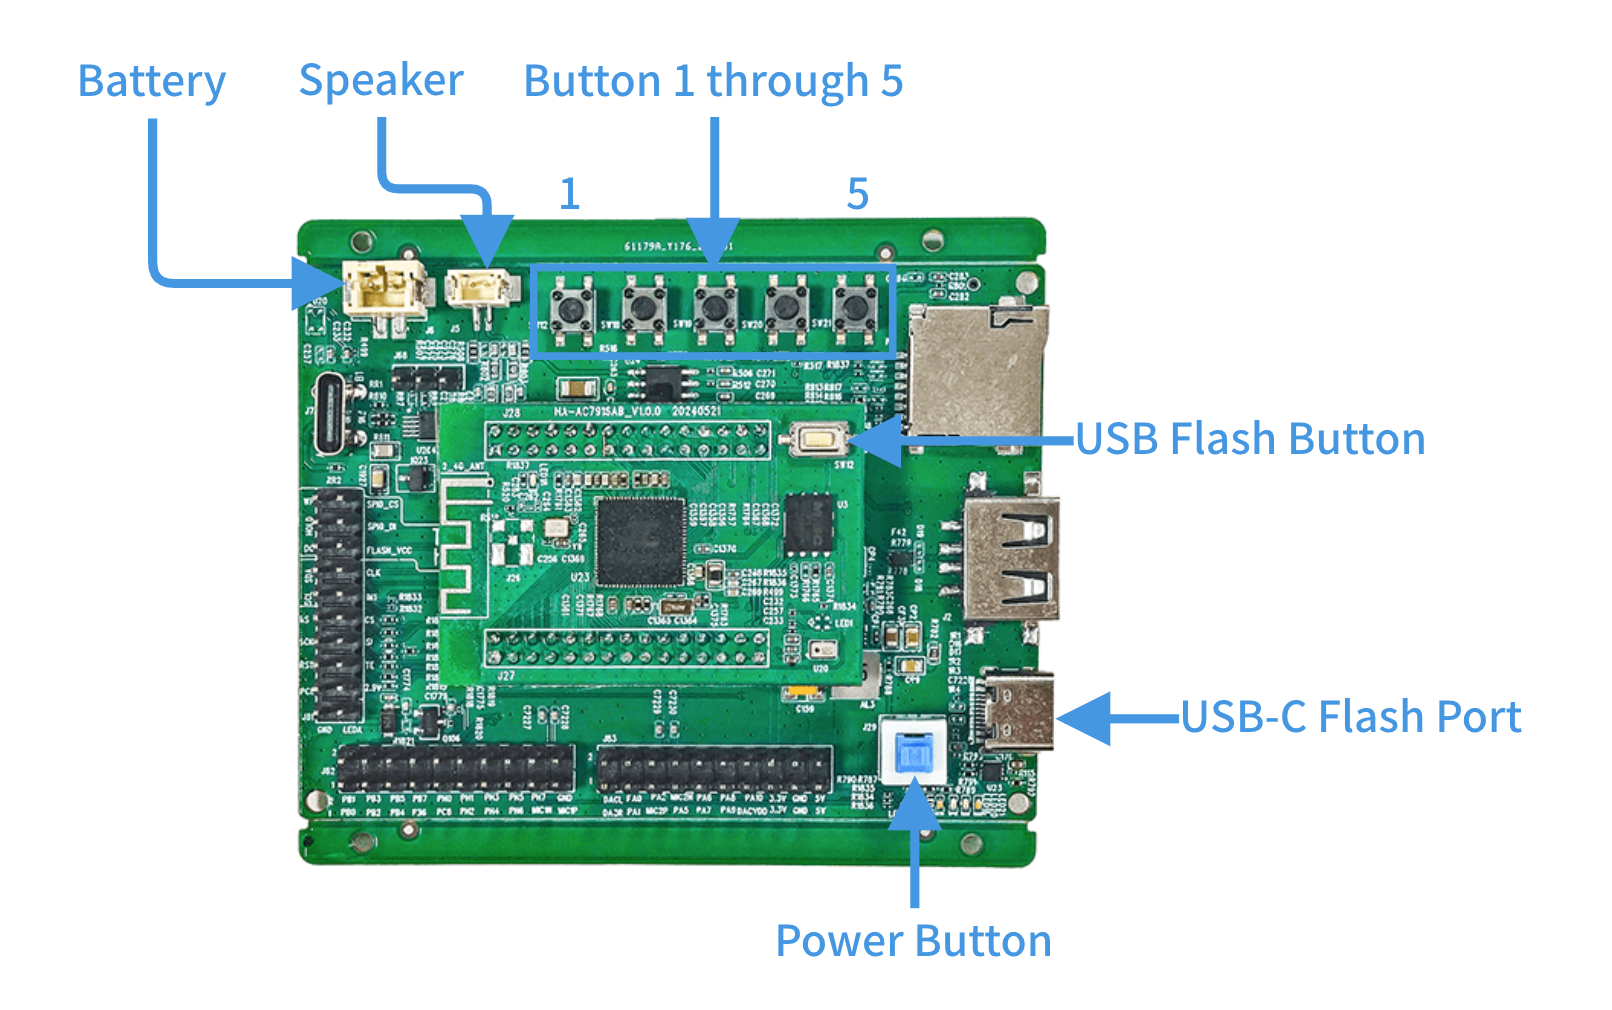
The HA-AC791N has 5 buttons for full control:
| Button | Function | Details |
|---|---|---|
| Button 1 | Recording Control | Start/Stop recording Cancels current AI speech if playing |
| Button 2 | Volume Up | Increase speaker volume |
| Button 3 | Volume Down | Decrease speaker volume |
| Button 4 | Wi-Fi Configuration | Enter Wi-Fi configuration mode |
| Button 5 | USB Flash Mode | Long press (3s) to enter USB update mode |
Detailed Button Operations
Button 1: Recording Control
| Operation | Function |
|---|---|
| Single Press | Start recording your voice |
| Press Again | Stop recording and send to AI |
| During AI Speech | Cancel current AI response |
Button 2 & 3: Volume Control
| Operation | Function |
|---|---|
| Single Press | Adjust volume up/down |
Button 4: Wi-Fi Configuration
| Operation | Function |
|---|---|
| Single Press | Enter Wi-Fi configuration mode |
Button 5: USB Flash Mode
| Operation | Function |
|---|---|
| Long Press (3s) | Enter USB firmware update mode |
4.2. Power Management
Powering On:
- Press the power button
- You will hear a startup sound
- If no sound, disconnect and reconnect the battery, then try again
Powering Off:
- Press the power button
- Device will shut down
Charging:
- Connect the device to a power source via USB cable
- Can be used while charging
Battery Disconnection:
- If the device is unresponsive, try disconnecting and reconnecting the battery
5. Features in Detail
5.1. AI Chat Modes
The HA-AC791N supports two activation modes for interacting with the AI.
🎯 Button Press Mode
How to use:
- Press Button 1 to start recording
- Speak your question or command
- Press Button 1 again to stop recording
- The recording will be sent to ChatGPT
- The AI response will play through the speaker
Use cases:
- Precise control over when recording starts and stops
- Noisy environments where wake word might trigger accidentally
- When you want to ensure the device is listening
🎤 Voice Activation Mode
How to use:
- Say the wake word: "XiaojieXiaojie" (pronounced: Shiao-jyeh Shiao-jyeh)
- The device will activate and start listening
- Speak your question or command
- Wait for the device to detect the end of your speech (automatic), OR
- Press Button 1 to manually stop recording
- The AI response will play through the speaker
Use cases:
- Hands-free operation
- Natural conversation flow
- When buttons are not easily accessible
6. Firmware
For detailed firmware update instructions and methods, please visit the dedicated firmware update page:
👉 View Firmware Update Guide for HA-AC791
7. Support
7.1. FAQ (Frequently Asked Questions)
Q1: Does the HA-AC791N need a smartphone app?
- A: No! The HA-AC791N is a standalone device. It connects directly to Wi-Fi and works independently without requiring a smartphone or the Hearit.AI app.
Q2: What Wi-Fi frequencies are supported?
- A: The device only supports 2.4GHz Wi-Fi networks. It does NOT support 5GHz networks. Please ensure your router has a 2.4GHz band enabled.
Q3: The device won't connect to Wi-Fi. What should I do?
- A:
- Verify you're using a 2.4GHz network (not 5GHz)
- Check that the Wi-Fi password is correct
- Ensure the Wi-Fi signal is strong where the device is located
- Try disconnecting and reconnecting the battery
- Re-enter configuration mode (Button 4) and try again
Q4: How do I know if the device is connected to Wi-Fi?
- A: After configuration, the device will announce "Connecting" and then confirm connection status. You can also try asking the AI a question - if it responds, you're connected.
Q5: The device is not responding to the wake word. What should I do?
- A:
- Speak clearly at normal volume
- Ensure you're saying "XiaojieXiaojie" correctly
- Reduce background noise
- Try using button press mode instead (Button 1)
- Check that device is powered on and connected to Wi-Fi
Q6: Can I use the device while it's charging?
- A: Yes, the HA-AC791N can be used while connected to USB power.
Q7: What languages does the AI support?
- A: The HA-AC791N uses OpenAI's GPT models, which support multiple languages. However, speech recognition may work best with English and Chinese. You can customize language behavior through the GPT_PROMPT setting.
Q8: How do I update the firmware?
- A: There are two methods:
- USB Update (Windows only): Connect to PC, hold Button 5 for 3s, use firmware tool
- Web OTA (all platforms): Press Button 4, access web page, click OTA, enter firmware URL
Q9: The device won't power on. What should I do?
- A:
- Try disconnecting and reconnecting the battery
- Ensure the battery is charged by connecting USB cable
- Press the power button firmly
- If still not working, contact support
Q10: Can I use this device for commercial applications?
- A: Yes, the HA-AC791N is designed as a development board and can be used for prototyping and commercial applications. Make sure to use your own OpenAI API key for production use.
7.2. Contact Us
If you encounter any issues that cannot be resolved, or if you have any suggestions, please feel free to contact us through the following channels:
- Official Support Email: [email protected]
- Online Help Center: https://support.hearit.ai
- Technical Documentation: https://docs.hearit.ai
- Developer Support: [email protected]
8. Legal
8.1. Disclaimer
AI Service Responsibility:
This product's AI functions are powered by third-party large language models (OpenAI GPT). Our company does not assume any responsibility for the accuracy, completeness, or compliance of content generated by these AI services.
Recording Legality:
When using the recording function, users must strictly comply with local laws and regulations regarding audio recording. Users are solely responsible for any legal disputes arising from illegal recording activities.
Firmware Update Risks:
During firmware updates, any device damage or data loss caused by improper operation (such as power interruption during update, use of unofficial firmware, physical device damage, etc.) or failure to follow official guidelines is not covered under warranty.
API Usage Costs:
When using your own OpenAI API key, you are responsible for all API usage costs incurred by the device. Monitor your OpenAI account usage to avoid unexpected charges.
Development Device:
This device is designed as a development board for prototyping and custom applications. While suitable for production use, users should thoroughly test their specific use case before deployment.
8.2. Warranty Policy
This product is provided with a limited warranty for a period of one (1) year from the date of purchase. This warranty does not cover damage caused by accidents, misuse, abuse, or unauthorized modifications. For detailed warranty terms, please visit our official warranty page.
Thank you for choosing HA-AC791N!
We are committed to continuously improving our products and services. Your feedback helps us make the HA-AC791N even better.
For the latest updates, tips, and tutorials, visit:
- Website: https://hearit.ai
- Documentation: https://docs.hearit.ai
- Developer Portal: https://dev.hearit.ai
- Community Forum: https://community.hearit.ai